
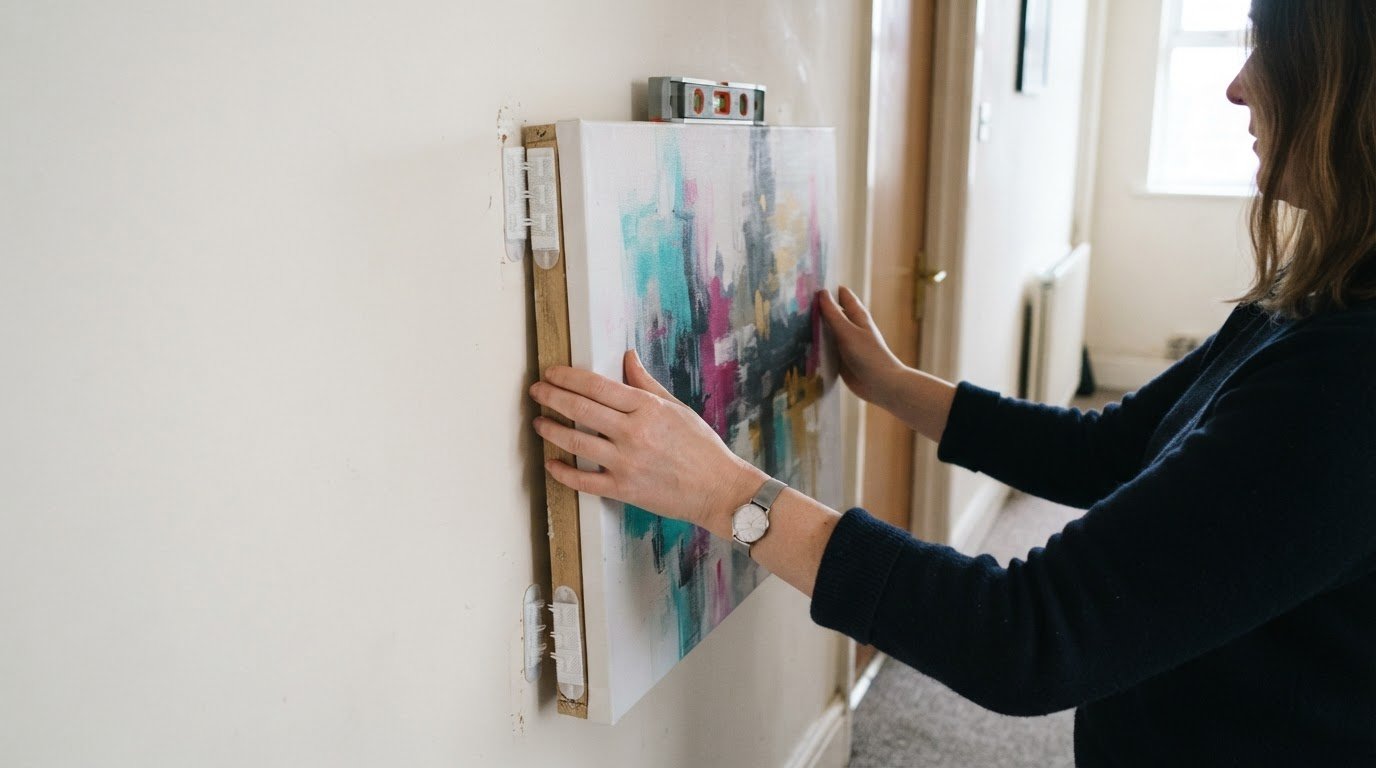
A canvas can sit flush against the wall without a single nail. To learn how to hang a canvas print without nails, choose picture hanging strips rated for its weight, fit them to the canvas and press it firmly against the wall for 30 seconds.
Hanging a canvas without nails is a tidy option when you want to avoid making holes. The key is matching the hanging method to the canvas and wall surface, then carefully positioning it so the display looks straight and secure.
In the steps ahead, you’ll learn what to gather, how to mark the canvas position and how to use picture hanging strips for a close, flush fit. You’ll also see why a clean, suitable surface matters and what to consider before pressing the canvas into place. A little preparation makes the job simpler, from the first pencil mark to the final level check.
Key Takeaways
- Prepare a clean, suitable wall surface so adhesive strips can make proper contact.
- Use a spirit level and pencil to mark the canvas centre, then position it around eye level, 57-60 inches from the ground.
- Gather a pencil, spirit level, cleaning cloth and weight-suitable hanging strips before you begin.
- Place strip halves at the canvas corners with the arrows facing upwards for a neat, flush fit.
How To Hang A Canvas Flush Against The Wall?
Choose a method that suits your canvas, and prepare its fixtures before positioning it. If you’re learning how to hang a canvas print without nails, picture hanging strips may work for a suitable canvas when used according to their instructions.
-
Choose a Hanging Method
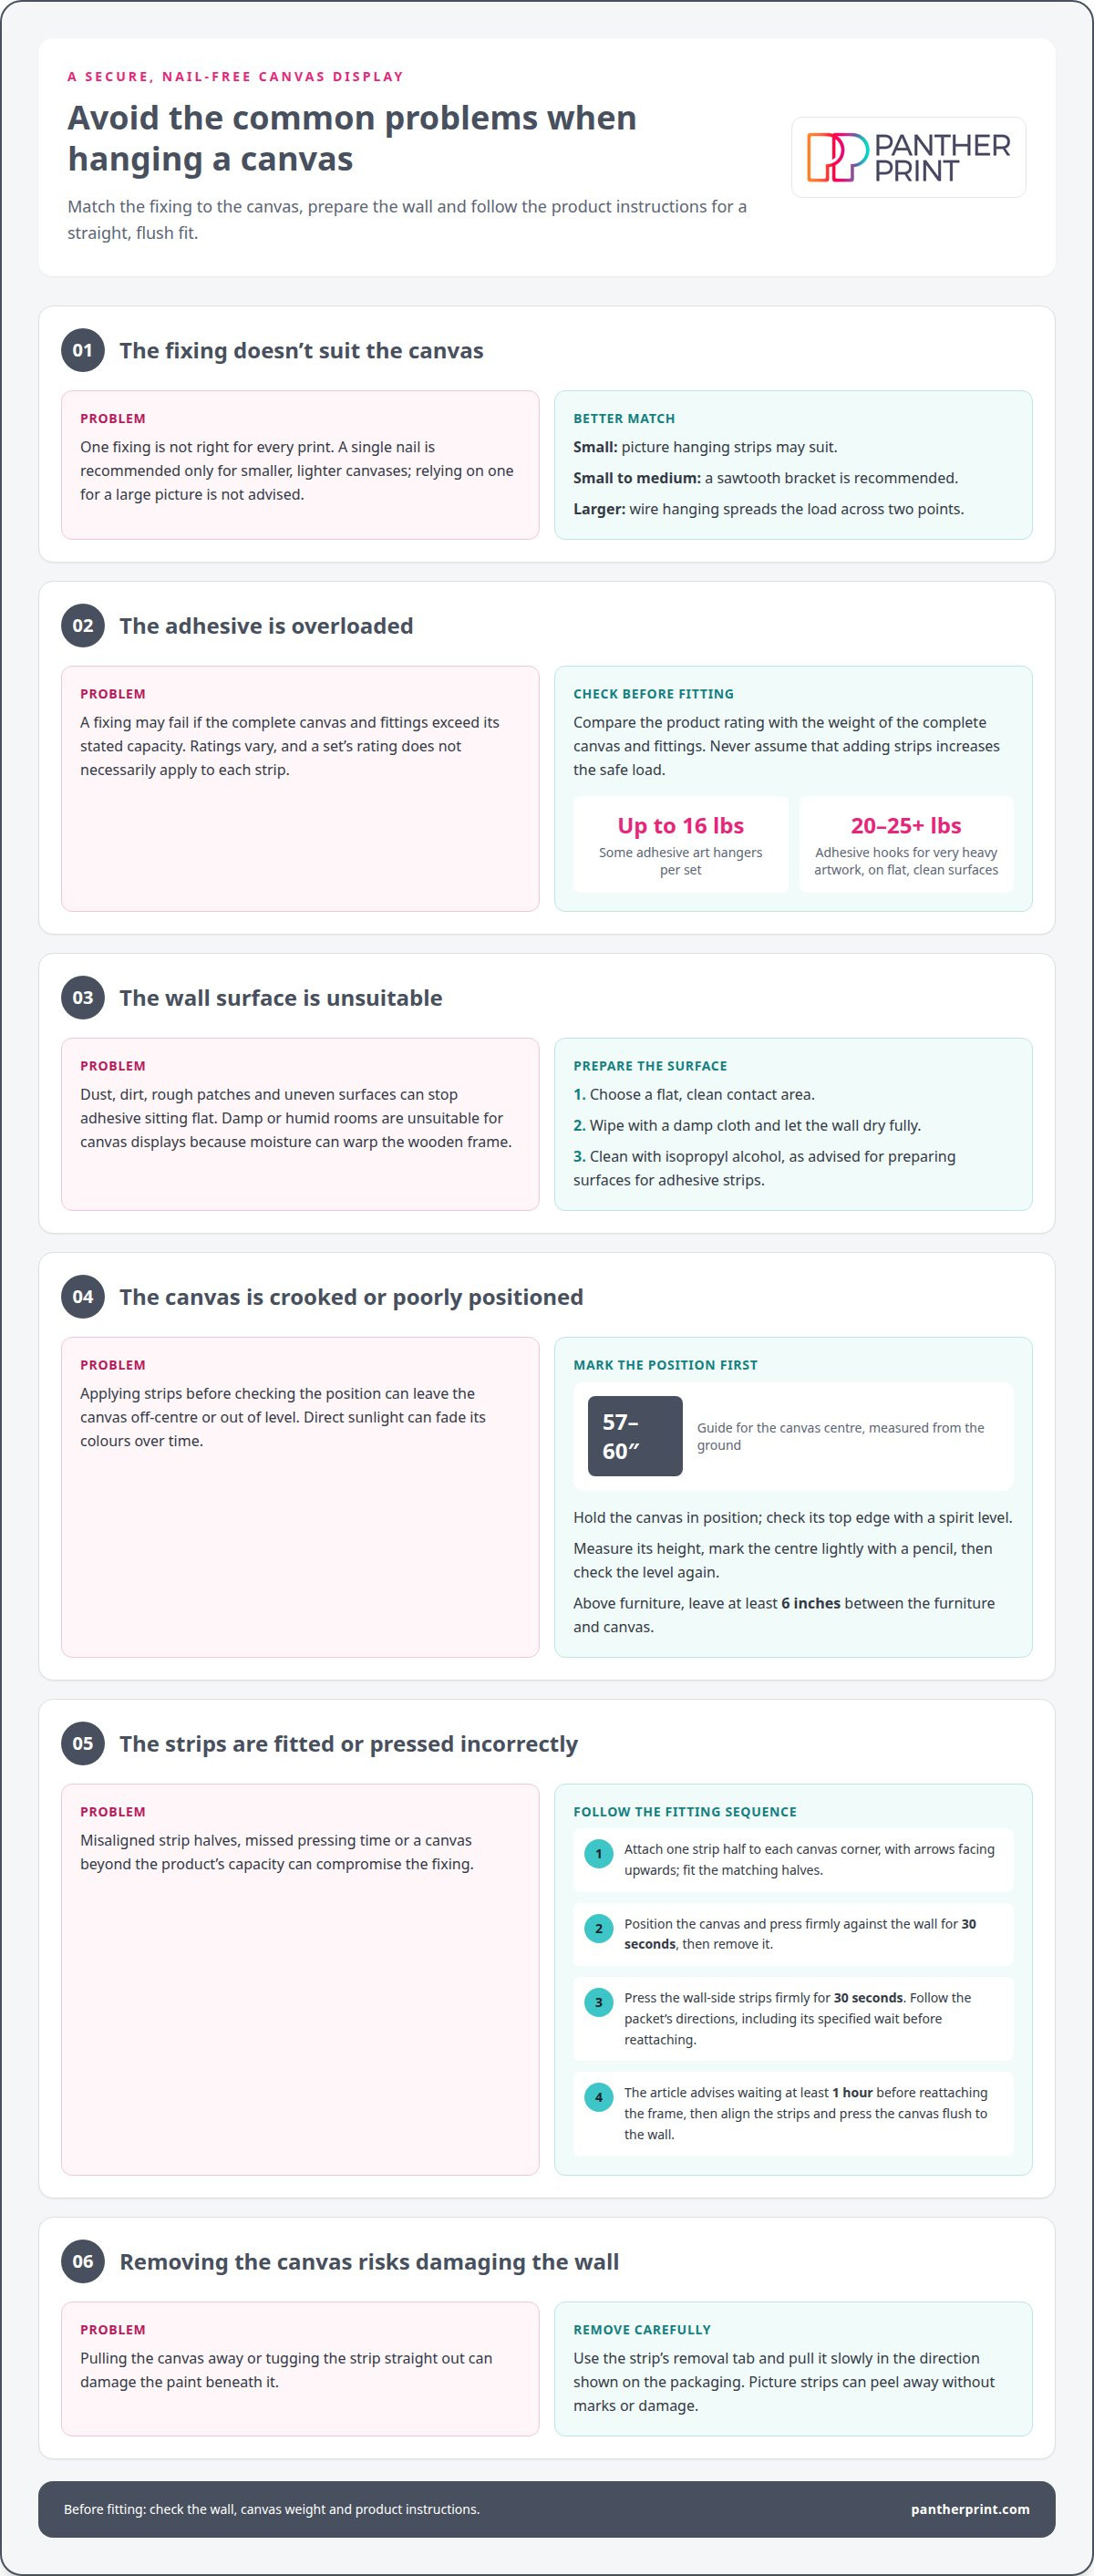
Start by considering the canvas’s size and weight. Picture hanging strips can suit small canvases, while sawtooth brackets are recommended for small to medium prints. Larger canvases are better suited to wire hanging, which spreads the load across two points. A single-nail method is recommended only for smaller, lighter canvases, so avoid relying on one nail for a large picture.
In rented accommodation, removable picture strips can help avoid nail holes. Use them only if the product instructions say they’re suitable for your wall and canvas.
-
Check Product Weight Capacities
Read the packet before attaching any adhesive fixture. Its stated weight capacity must meet or exceed the canvas’s weight. Some adhesive art hangers can support up to 16 lbs per set, but capacities vary by product. Don’t assume a set’s rating applies to each strip or that extra strips automatically increase the safe load.
For very heavy artwork, adhesive hooks rated for 20-25+ lbs are recommended only on flat, clean surfaces. Check the rating before choosing heavy-duty Velcro strips for a larger picture.
-
Gather Tools and Fixtures
Set out the selected picture hanging strips, a pencil and a spirit level. Keep a clean cloth nearby for preparing the wall, and use the canvas to check where the strips will sit. For another method, gather the matching fixtures: a sawtooth bracket suits small to medium prints, while wire is recommended for larger ones.
Lay everything within reach before you start. This helps you keep the canvas steady as you position it.
-
Attach Strips to the Canvas and Wall
Attach one half of a picture hanging strip to each canvas corner, with the arrows facing upwards. Fit the matching halves, then position the canvas. Press it firmly against the wall for 30 seconds before removing it. The wall-side strips will remain in place.
Rub and press those strips on the wall for 30 seconds to help secure them. Align the canvas and press it flush against the wall. Follow the packet’s directions throughout. These steps show how to hang a canvas print without nails while keeping the fixing close to the wall. Don’t use strips on a surface or canvas beyond their stated capacity.
What surfaces can I hang my pictures on without causing damage?
To hang a canvas without nails, use adhesive strips on a clean, suitable wall and keep within their stated weight limit. To remove picture strips, peel them away using their removal tab; they can come off without marks or damage.
-
Choose Adhesive Strips or Hooks
Choose picture hanging strips for a small canvas, or adhesive hooks if the method suits the canvas’s weight and the wall surface. Use hooks only on a flat, clean surface. Before applying either option, wipe the wall with a damp cloth and let it dry. Then clean the area with isopropyl alcohol, as advised for preparing surfaces for adhesive strips.
Avoid rough or dirty patches where the adhesive cannot sit flat. A smooth contact area helps the strips bond evenly rather than lifting at the edges.
-
Check Adhesive Hanger Weight Limits
Read the product’s weight rating before mounting the picture, then compare it with the complete canvas and fittings. Some adhesive art hangers support up to 16 lbs per set. For very heavy artwork, adhesive hooks rated for 20-25+ lbs are recommended, but only on flat, clean surfaces. Don’t exceed the stated capacity or assume a set’s rating applies to each strip separately.
Once the wall and canvas are ready, attach the strips as their packet directs. Press the wall-side adhesive firmly into place, then leave it for at least 1 hour before reattaching the frame. This wait allows the adhesive time to bond. Reattach the canvas carefully, keeping the strips aligned so it sits straight and close to the wall.
When you later remove the picture, pull the strip’s tab slowly in the direction shown on its packaging. Don’t tug the canvas away from the wall or pull the strip straight out. Picture hanging strips can peel away without leaving marks or damage, while careful removal helps protect the paint beneath them.
Marking the wall for canvas placement
Mark the canvas position before fitting adhesive strips. A spirit level and pencil help you keep the picture straight and centred.
-
Check the Wall Surface
Choose a flat, clean area so adhesive strips can make even contact. Avoid dusty, dirty or uneven patches, where the strips may not sit firmly against the wall. Damp or humid rooms are also unsuitable for canvas displays, as moisture can warp the wooden frame.
Look at the full area before marking. Check that the canvas won’t sit in direct sunlight, which can fade its colours over time. If it will hang above furniture, leave at least 6 inches between the canvas and the furniture.
-
Prepare and Measure the Wall
Hold the canvas in the chosen position, then use a spirit level to check its top edge. Measure the canvas height so you can locate its centre accurately. A canvas is generally displayed at eye level, around 57-60 inches from the ground; use that as the guide for its centre point.
Mark the centre point on the wall with a pencil. Keep the mark light, and check the level again before deciding where the adhesive will go. For a picture above a sofa or sideboard, check the gap above the furniture too, so the canvas feels connected to the space.
-
Prepare the Frame and Wall
Set the canvas down carefully and inspect the back before attaching anything. Check that its corners are sound and that the surface is clean where the strips will sit. Place protective pads on the back of the canvas to help prevent paint damage where it touches the wall.
Wipe the wall with a damp cloth, then let it dry fully before applying adhesive. For adhesive strips, clean the contact area with isopropyl alcohol as well. Once dry, line up the frame’s centre with your pencil mark and check it is level before pressing it firmly into position.
Materials needed to hang a canvas without nails
Gather the hanging materials before you start. Each item has a purpose: preparing the wall, marking the position, protecting the paint or securing the canvas.
- Picture hanging strips: Choose adhesive strips designed for picture hanging, and match their stated weight capacity to the complete canvas. Keep the packaging nearby to follow the fitting and removal instructions. Choose the number and placement of strips according to the canvas and product directions, rather than guessing.
- A cleaning cloth and isopropyl alcohol: Use a damp cloth to remove dust from the wall, then clean the adhesive contact area with isopropyl alcohol. Let the surface dry before applying strips. Dirt, grease or moisture can interfere with adhesion, so prepare the exact places where the strips will sit.
- A pencil and spirit level: Use the pencil to make a small placement mark, and the level to check that the canvas hangs straight. A light mark is easier to remove than a heavy line. Keep both tools close so you can check the alignment before pressing the adhesive firmly into place.
- A tape measure and protective pads: Measure the canvas and its position in relation to nearby furniture, then add protective pads to the back. The pads help prevent paint damage where the canvas touches the wall and stop the frame rubbing directly against the painted surface.
- The canvas and its weight: Have the complete canvas ready before choosing strips, since the hanging product must support its weight. Check the frame’s back for a clean, flat area where adhesive can attach. Once your materials are set out, choose a canvas print for your space and plan its position before hanging.
Panther Print: Printed Paintings
Panther Print offers Printed Paintings to bring colour and character to your walls. Once you’ve chosen a suitable hanging method, pick artwork that fits the room and the space you measured. Abstract Canvas Prints can add bold shapes, while Animals & Wildlife prints bring a nature-inspired touch. Art for Kids & Nursery Art can brighten a child’s room.
Consider the canvas’s placement as well as its subject. A busy design may suit a clear wall, while a calmer image can complement patterned furnishings. Matching the print’s size and weight to the hanging strips is essential for a neat display.
If you’d like a hand choosing a Printed Painting for your space, contact Panther Print.
Make your wall feel like yours
Plan a display that feels personal as well as well placed. Think about the mood you want to create: a calming focal point, a splash of colour or a picture that makes you smile each day. These choices help your canvas feel at home in the room.
Learning how to hang a canvas print without nails gives you a flexible way to bring your idea to life. Take your time choosing the image and position, then let the finished display add character to the room.
If you’d like a hand finding a print that suits your space, contact Panther Print for canvas help. Your next favourite corner could be closer than you think.
Frequently Asked Questions
Looking for some inspiration for your picture hanging project?
Start with the room’s colours and the feeling you want the picture to create. A bold print can become the focal point above a simple console, while a quieter image can sit comfortably among patterned cushions or bookshelves. Try paper cut-outs the size of the canvas to compare positions before hanging. This lets you test the arrangement without adding marks or moving adhesive.
What Is The Best Alternative To Wall Nails?
For a suitable canvas, picture hanging strips are a practical alternative to wall nails. They keep the picture close to the wall without drilling a hole. The right choice depends on the canvas’s weight and the wall finish, so follow the product instructions for both. If the room has a picture rail, compatible rail hooks can also support artwork without adding new wall fixings.
What adhesive strips work for hanging canvas prints on UK walls?
Choose strips labelled for picture hanging and suitable for your wall finish. Compare the product’s stated capacity with the complete canvas, including its frame, rather than choosing by appearance alone. Wall finishes vary, so look for instructions that name the surface you’re using. Don’t use a strip set if its packaging doesn’t cover that surface or load.
Can you hang a canvas print without nails on painted or wallpapered walls?
Adhesive strips may be used on a clean, flat painted wall when the product instructions allow that finish. Loose, flaking or powdery paint gives adhesive a weak surface to grip. Wallpaper needs extra care: strips may pull at the paper or its top layer during removal, especially near seams. Check surface compatibility first, and don’t place a strip across a wallpaper join.